Unlock Premium, Members-Only Content
Your source for the most relevant updates in sustainable construction
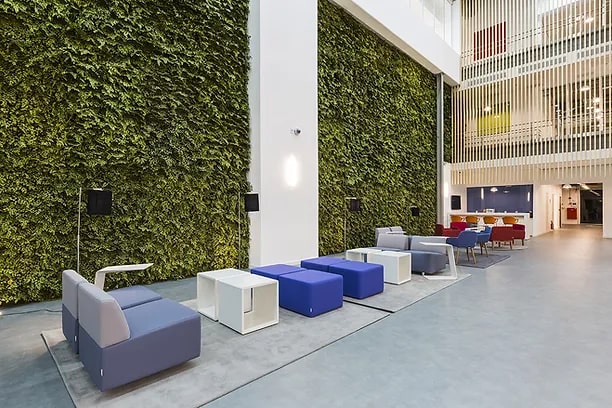
Why Choose an Indoor Living Wall?
Indoor living walls are more than just a trend—they’re a transformation. Imagine walking into a room where nature isn’t just outside your window but climbing your walls, breathing life into every corner. That’s the magic of an indoor living wall. But why should you consider installing one in your space? Let’s dive into the compelling reasons.
Indoor Living Wall and Aesthetic Appeal: Bringing Nature Indoors
Living walls are like pieces of living art. They add a lush, vibrant touch to any space, turning a plain wall into a dynamic focal point. Whether you’re going for a minimalist vibe or a jungle-like atmosphere, there’s a living wall design that can make your space pop.
Table: Aesthetic Benefits of Indoor Living Walls
| Feature | Impact on Space |
|---|---|
| Color & Texture | Adds depth and a splash of natural colors |
| Focal Point | Draws the eye, creating a conversation starter |
| Mood Enhancement | Creates a calming, natural environment |
Indoor Living Wall and Health Benefits: Clean Air, Happy Mind
Plants are nature’s air purifiers. An indoor living wall can help filter out toxins, increase humidity, and reduce stress levels—all while looking amazing. The benefits aren’t just about aesthetics; they’re about feeling better every time you step into the room.
Health Perks of Living Walls:
- Air Purification: Plants absorb pollutants like VOCs (volatile organic compounds), helping you breathe easier.
- Humidity Control: Adds moisture to dry indoor air, which is great during winter months.
- Mental Well-being: Studies show that being around plants can reduce stress and boost your mood. Who couldn’t use a little more zen in their life?
Understanding Living Wall Systems
Before you rush off to buy plants, you need to understand the different types of living wall systems available. It’s not a one-size-fits-all deal—each system has its own perks and quirks.
Modular Systems: Flexibility at Its Finest
Modular systems are like building blocks for your green wall. They consist of individual units that you can arrange and rearrange however you like. Want to start small and expand later? No problem. These systems are perfect for those who want flexibility.
Pros:
- Easy to install and modify
- Ideal for beginners or small spaces
- Can be DIY or professionally installed
Cons:
- May require more frequent maintenance
- Limited plant size depending on the module
Panel Systems: Seamless and Stunning
Panel systems offer a more integrated look, with larger sections that are installed as a unit. These are often used for bigger projects and can provide a seamless, professional finish.
Pros:
- Supports a wider variety of plants
- Offers a more cohesive aesthetic
- Great for large-scale installations
Cons:
- Often requires professional installation
- Less flexibility once installed
Pocket Systems: Budget-Friendly and Simple
If you’re looking for something affordable and easy to install, pocket systems might be your best bet. These systems use fabric or plastic pockets to hold individual plants.
Pros:
- Most affordable option
- Simple and easy to DIY
- Great for small walls or starter projects
Cons:
- Limited plant variety due to pocket size
- May not be as durable or long-lasting as other systems
Table: Comparison of Living Wall Systems
| System Type | Flexibility | Aesthetic | Ease of Installation | Cost |
|---|---|---|---|---|
| Modular | High | Moderate | Easy | $$ |
| Panel | Low | High | Complex | $$$ |
| Moderate | Basic | Very Easy | $ |
Indoor Living Wall: Choosing the Right System for Your Space
The right system for your living wall depends on your goals, budget, and space. If you’re aiming for a massive statement piece in a commercial space, panels might be your go-to. For a cozy, adaptable setup in your home, modular or pocket systems could be perfect.
By understanding these options, you can pick a system that not only fits your space but also matches your vision. And remember, the best living wall is one that you’ll love maintaining as much as looking at.
Indoor Living Wall Choosing the Right Location
Picking the perfect spot for your indoor living wall is like setting the stage for a show—it’s all about the lighting, space, and how the wall will interact with its surroundings. You wouldn’t hang a masterpiece in a dark corner, would you? The same goes for your living wall.
Light Requirements: Natural vs. Artificial
Plants need light like we need coffee in the morning—without it, they just won’t thrive. For an indoor living wall, the light source is critical. Natural light is ideal, but it’s not always available in the quantity or quality your plants need.
Natural Light:
- Best for: Spaces with large, south-facing windows.
- Challenges: Light can be too harsh at times, causing some plants to burn or dry out. It’s also inconsistent, especially in winter months.
Artificial Light:
- Best for: Rooms with limited natural light, such as basements or interior spaces.
- Types: LED grow lights are the gold standard. They mimic the sun’s spectrum and can be customized to meet the needs of different plants.
- Placement: Install lights above or in front of the living wall to ensure even coverage.
Pro Tip: If you’re going with artificial lighting, consider using a timer. Plants, like people, benefit from a regular schedule.
Wall Structure and Weight Considerations
A living wall isn’t just a few potted plants—it’s an entire garden that’s vertical. This means you need to think about the weight and how your wall will support it.
Weight Considerations:
- Weight Per Square Foot: A saturated living wall can weigh between 5 to 20 pounds per square foot. That’s not something you want hanging on a flimsy drywall.
- Structural Support: Anchor your living wall to studs in the wall. If you’re unsure, consult a professional to avoid any mid-garden disasters.
- Materials: Choose lightweight, yet durable materials for the wall’s framework. Pressure-treated wood or metal brackets are good options.
Pro Tip: For renters, modular systems or freestanding living walls can be a smart choice. They offer the beauty of a living wall without the need to make permanent changes to the structure.
Selecting Plants for Your Indoor Living Wall
Not all plants are cut out for vertical life. Some prefer to spread out, while others like to climb. Choosing the right plants is key to creating a living wall that not only survives but thrives.
Best Plants for Low Light
If your living wall will be in a room with limited natural light, you’ll need to choose plants that don’t mind the shade. Here are some top contenders:
- Ferns: These lush, green plants thrive in low light and high humidity, making them perfect for bathrooms or dim corners.
- Pothos: Almost impossible to kill, Pothos can handle low light and still look fantastic with its trailing vines.
- Philodendron: Similar to Pothos, Philodendrons are tough, adaptable, and love to climb.
Pro Tip: Group plants with similar light needs together. This ensures that one part of your living wall doesn’t end up overgrown while another section struggles to survive.
Plants for Higher Light Conditions
If your living wall will be basking in sunlight, you can opt for plants that need a bit more brightness to flourish.
- Succulents: They love sunlight and need very little water, making them low-maintenance beauties.
- Peace Lilies: These plants not only enjoy bright light but are also known for their air-purifying qualities.
- Spider Plants: Great for beginners, these resilient plants thrive in bright light and add a nice trailing effect.
Pro Tip: Rotate your plants every few weeks to ensure even light exposure. This prevents one side from getting all the sun while the other stays in the shade.
Creating a Balanced Plant Palette
Mixing and matching plants with different textures, colors, and growth habits will make your living wall visually appealing.
- Contrast: Pair smooth-leaved plants like ferns with rougher textures like succulents.
- Color: Use a mix of green hues with splashes of color from flowering plants or variegated leaves.
- Growth Patterns: Combine trailing plants with those that grow upwards to create depth and interest.
Table: Ideal Plant Combinations for Indoor Living Walls
| Light Level | Plant Types | Ideal Locations |
|---|---|---|
| Low Light | Ferns, Pothos, Philodendron | Bathrooms, Hallways, Corners |
| Medium Light | Peace Lilies, Spider Plants, Dracaena | Living Rooms, Bedrooms |
| High Light | Succulents, Ficus, ZZ Plants | Sunrooms, South-facing Windows |
By selecting the right plants and placing them in an optimal location, you’ll set the foundation for a living wall that not only looks stunning but is also healthy and sustainable. The next step? Designing and installing your green masterpiece!
Designing Your Indoor Living Wall
Now that you’ve got your location and plants figured out, it’s time to get creative. Designing a living wall is where function meets flair—it’s all about arranging your plants in a way that’s both practical and visually stunning. Whether you’re going for a sleek, minimalist look or a vibrant, wild garden vibe, design plays a key role.
Layout Ideas: Vertical Gardens, Mixed Arrangements, and More
Designing a living wall isn’t just about sticking plants on the wall—it’s about creating a composition that enhances your space. Here are a few layout ideas to get your creativity flowing:
- Vertical Rows: Ideal for narrow spaces, this layout creates a clean, organized look. Use plants with similar growth habits to maintain uniformity.
- Mixed Planting: Combine different plant types—some that trail, some that climb, and some that stay compact. This adds depth and interest to your wall.
- Geometric Patterns: Arrange plants in squares, diamonds, or other geometric shapes. This structured approach can give your wall a more modern, artistic feel.
- Cluster Grouping: Group similar plants together in clusters. This mimics how plants grow in nature and creates a more organic look.
Pro Tip: Consider the wall’s background color. Darker walls can make green plants pop, while lighter walls might benefit from plants with variegated leaves or flowers.
Aesthetic Considerations: Plant Height, Color, and Texture
Creating a living wall is like painting a picture—you need to consider every element to make it visually pleasing. Here’s how to think about plant height, color, and texture in your design:
- Height Variations: Mix tall, spiky plants with shorter, bushy ones to create a dynamic look. Plants like ferns can be used to fill in gaps, while taller plants like dracaenas can add vertical interest.
- Color Coordination: Stick to a monochromatic scheme for a calming effect, or go bold with contrasting colors. For example, pair deep green foliage with plants that have silver or purple leaves.
- Texture Play: Combine plants with different textures to add depth. Smooth, glossy leaves can be contrasted with fuzzy or serrated foliage to keep the wall from looking flat.
Pro Tip: Consider seasonal changes in plant color and growth. Some plants may change color or lose leaves, affecting your wall’s overall look.
List: Key Aesthetic Considerations for Living Wall Design
- Balance: Distribute plants evenly to avoid overcrowding one section.
- Symmetry: Use symmetry to create a formal look, or go asymmetrical for a more relaxed vibe.
- Focal Points: Create a focal point with a particularly striking plant or arrangement.
Incorporating Accessories and Decorations
Plants are the star of the show, but that doesn’t mean you can’t add some supporting characters. Accessories can elevate the look of your living wall and add a personal touch.
- Lighting: Use spotlights or string lights to highlight certain areas. This not only enhances the plants’ appearance but also adds warmth and ambiance to the room.
- Decorative Planters: Swap out standard planters for something more decorative. Think ceramic pots, rustic wooden boxes, or sleek metal containers.
- Artwork Integration: Combine your living wall with art pieces. For example, you could frame a section of the wall or incorporate small sculptures among the plants.
Table: Popular Accessories for Indoor Living Walls
| Accessory Type | Purpose | Design Impact |
|---|---|---|
| Lighting | Enhances plant visibility, adds ambiance | Creates focal points, adds warmth |
| Planters | Holds and supports plants | Adds style, can match room’s décor |
| Artwork | Complements the natural theme | Elevates the wall from garden to art |
By carefully considering your design elements, you can create a living wall that not only thrives but also serves as a beautiful, integrated part of your home’s décor.
Indoor Living Wall Installation Guide: Step-by-Step Process
You’ve chosen your plants, designed your layout—now it’s time to bring your living wall to life. Installing a living wall may seem daunting, but with the right steps, you can create your own green masterpiece.
Tools and Materials Needed
Before you start, make sure you have all the tools and materials ready. Here’s what you’ll typically need:
Tools:
- Drill with various bits
- Screws and wall anchors
- Level
- Tape measure
- Hammer
- Utility knife
Materials:
- Planting medium (soil, mat, or modular containers)
- Irrigation system components (tubes, drippers, timers)
- Mounting brackets or framework
- Plants (as per your design)
Pro Tip: Double-check your plant measurements and wall area before buying materials. It’s better to have a little extra than to run out halfway through the project.
Building the Frame and Installing Planters
The first step in the installation is to build a sturdy frame. This will hold the weight of the plants, soil, and water.
Step 1: Mark and Measure
- Measure your wall space and mark where the frame will go. Use a level to ensure everything is straight.
Step 2: Secure the Frame
- Attach the frame to the wall using screws and wall anchors. Make sure it’s strong enough to support the weight of the plants, especially when watered.
Step 3: Install Planters or Modules
- Depending on your system (pocket, panel, or modular), install the planters. Ensure they are securely attached and evenly spaced.
Pro Tip: Leave some space between planters for ventilation and to allow the plants to spread as they grow.
Setting Up the Irrigation System
Watering your plants is crucial, especially for vertical gardens where water needs to be evenly distributed. Here’s how to set up an efficient irrigation system:
Step 1: Choose Your System
- For smaller walls, hand watering might suffice. For larger installations, consider drip irrigation or a recirculating system.
Step 2: Install Tubing
- Run tubing along the top of the wall, connecting drippers or emitters to each planter. Make sure the system covers the entire wall evenly.
Step 3: Connect to Water Source
- Connect the tubing to your water source and, if possible, install a timer. This ensures your plants get the right amount of water at regular intervals.
Pro Tip: Regularly check the irrigation system for leaks or blockages. A malfunctioning system can lead to overwatering or drought stress.
Final Touches and Planting
With everything set up, it’s time to plant your greenery.
Step 1: Prepare the Plants
- Remove plants from their nursery pots and gently tease out the roots. This helps them establish better in their new environment.
Step 2: Arrange and Plant
- Start from the bottom of the wall and work your way up. Place taller plants at the top, where they can grow without overshadowing smaller plants.
Step 3: Water and Settle
- After planting, water the entire wall thoroughly. This helps settle the plants and remove any air pockets in the soil.
Pro Tip: Give your living wall a few weeks to settle before making any major adjustments. Plants need time to acclimate to their new vertical home.
By following these steps, you’ll be well on your way to creating a stunning living wall that will be the envy of all who see it.
Indoor Living Wall and Irrigation Systems: Keeping Your Plants Hydrated
Watering is the lifeblood of your living wall. Unlike a traditional garden where gravity does the work, vertical gardens require a bit more planning to ensure every plant gets the hydration it needs. A well-designed irrigation system is key to maintaining a lush, thriving living wall.
Manual Watering vs. Automated Drip Irrigation
When it comes to watering your indoor living wall, you have two primary options: manual watering and automated systems. Each has its own set of benefits and challenges.
Manual Watering:
- Best for: Small walls, or if you prefer hands-on gardening.
- Challenges: Inconsistent watering can lead to uneven growth. You’ll need to water regularly, and it can be difficult to reach plants at the top.
- Method: Use a watering can with a long spout or a hand-held spray bottle. Ensure water reaches the roots of every plant.
Automated Drip Irrigation:
- Best for: Large walls or installations where consistency is key.
- Benefits: Provides consistent moisture levels, reduces the risk of over or under-watering, and saves time.
- Components: Includes tubing, drippers or emitters, a water source, and often a timer to automate the process.
Pro Tip: If you’re opting for an automated system, consider adding a moisture sensor. This can adjust watering levels based on the actual needs of the plants, preventing waste and ensuring optimal plant health.
Troubleshooting Common Irrigation Issues
Even the best-designed systems can encounter problems. Here’s how to troubleshoot some common issues you might face with your living wall’s irrigation.
- Uneven Water Distribution: If some plants are thriving while others are wilting, you might have an issue with uneven water distribution. Check for clogged drippers or misaligned tubing.
- Overwatering: Soggy roots can lead to rot. Ensure your system isn’t delivering too much water. Reduce the watering frequency or duration, and check that your plants have proper drainage.
- Underwatering: Dry patches in the soil indicate underwatering. Increase the frequency of watering or adjust the system to ensure all plants are getting enough moisture.
- Leaks: If you notice water pooling at the base of your wall, you might have a leak in the system. Inspect the tubing and connections, and replace any damaged parts.
Table: Quick Fixes for Irrigation Problems
| Problem | Possible Cause | Solution |
|---|---|---|
| Uneven Growth | Clogged drippers, poor alignment | Clean or replace drippers, adjust tubing |
| Root Rot | Overwatering | Reduce watering frequency, improve drainage |
| Dry Spots | Insufficient watering | Increase watering time, check for clogs |
| Water Pooling | Leaks in tubing | Inspect and repair tubing connections |
Setting Up a Recirculating System
For larger or more complex living walls, a recirculating irrigation system might be the way to go. This system not only conserves water but also ensures that your plants are continuously fed with nutrients.
Step 1: Install a Reservoir
- Place a reservoir at the base of your living wall. This will collect any excess water that drips down from the plants.
Step 2: Pump Installation
- Install a pump in the reservoir. The pump will send the water back to the top of the wall, creating a continuous loop.
Step 3: Connect Tubing
- Run tubing from the pump to the top of the wall. Ensure it’s securely attached to prevent leaks.
Step 4: Attach Drippers
- Attach drippers along the tubing to distribute water evenly across the wall.
Step 5: Add Nutrients
- Periodically add nutrients to the reservoir. This ensures that as the water recirculates, it continues to feed the plants.
Pro Tip: Monitor water levels in the reservoir regularly. Evaporation and plant uptake can lower levels over time, so top it up as needed.
Lighting Solutions for Indoor Living Walls
Lighting is just as crucial as watering when it comes to maintaining a vibrant indoor living wall. Without proper light, plants can become leggy, lose their color, or even die. The challenge with indoor living walls is that they often don’t get enough natural light, so supplementing with artificial lighting is key.
Types of Grow Lights and Their Benefits
There are several types of grow lights to choose from, each offering different benefits depending on the needs of your plants.
LED Grow Lights:
- Best for: Energy efficiency and full-spectrum light.
- Benefits: LED lights are energy-efficient, long-lasting, and emit very little heat, making them ideal for indoor spaces. They can be tailored to emit specific wavelengths of light that plants need for photosynthesis.
- Drawback: They can be more expensive upfront compared to other options.
Fluorescent Lights:
- Best for: Small to medium-sized living walls.
- Benefits: Fluorescent lights are affordable and widely available. They provide a good amount of light for most plants and are especially effective for low-light plants.
- Drawback: They have a shorter lifespan and are less energy-efficient than LEDs.
Incandescent Lights:
- Best for: Warmth-loving plants, small installations.
- Benefits: Incandescent lights are inexpensive and give off a warm light that some plants love.
- Drawback: They are not energy-efficient, produce a lot of heat, and are generally not recommended for large living walls.
Pro Tip: Aim for grow lights that provide full-spectrum light, which closely mimics natural sunlight. This ensures that plants get all the wavelengths they need for healthy growth.
Positioning Lights for Optimal Growth
Where you place your lights is just as important as the type of lights you use. Here are some tips for positioning your grow lights:
- Above the Wall: Position lights directly above the wall to mimic sunlight coming from above. This encourages natural growth patterns and prevents plants from leaning toward the light source.
- Even Coverage: Ensure that light is evenly distributed across the entire wall. You don’t want any dark spots where plants might struggle.
- Adjustable Fixtures: Use adjustable fixtures so you can move lights closer or further away as needed. This is especially useful as plants grow and their light needs change.
- Lighting Duration: Most indoor plants need about 12-16 hours of light per day. Use a timer to automate the process and ensure consistency.
List: Key Considerations for Light Placement
- Distance from Plants: Keep lights 6-12 inches above the plants, depending on light intensity.
- Angle of Light: Aim for a direct, overhead angle to simulate natural sunlight.
- Light Distribution: Use reflectors or multiple light sources to ensure even coverage.
Indoor Living Wall: Balancing Natural and Artificial Light
While grow lights are essential, you shouldn’t overlook the benefits of natural light. If your living wall is near a window, you can use a combination of natural and artificial light to create an ideal environment.
Natural Light Sources:
- East-Facing Windows: Provide gentle morning light, which is ideal for most indoor plants.
- South-Facing Windows: Offer strong, direct light for much of the day, suitable for high-light plants.
- North-Facing Windows: Typically offer the least amount of light, so you’ll need to supplement with grow lights.
Pro Tip: Rotate your plants occasionally to ensure even light exposure. This prevents one side from becoming leggy or underdeveloped.
With the right lighting setup, your indoor living wall will not only survive but thrive, becoming a vibrant and dynamic feature in your space. Proper light, just like water, is crucial to the health and beauty of your green wall.
Maintenance Tips for a Thriving Indoor Living Wall
Creating a living wall is just the beginning—keeping it healthy and vibrant requires ongoing maintenance. Regular care ensures your wall remains lush and beautiful for years to come. Here’s how to keep your green masterpiece in top shape.
Regular Care: Pruning, Feeding, and Pest Control
Just like any garden, an indoor living wall needs regular attention. Here’s a breakdown of the essential maintenance tasks:
Pruning:
- Why: Pruning helps to maintain the shape and health of your plants. It prevents overcrowding and encourages new growth.
- How: Use clean, sharp scissors or pruning shears to trim back overgrown or dead foliage. For trailing plants, cut back to encourage fuller growth.
- Frequency: Depending on the plant type, pruning may be needed monthly or quarterly.
Feeding:
- Why: Indoor plants rely on the nutrients in their soil, which can deplete over time. Regular feeding replenishes these nutrients and keeps your plants healthy.
- How: Use a balanced, water-soluble fertilizer. Apply during the growing season (spring and summer), and reduce feeding during the dormant months (fall and winter).
- Frequency: Feed every 4-6 weeks during the growing season.
Pest Control:
- Why: Pests like aphids, spider mites, and scale insects can damage your plants. Regular inspection and prompt action are key to keeping your wall pest-free.
- How: Inspect plants regularly for signs of pests, such as discolored leaves or webbing. Use natural pest control methods, such as neem oil or insecticidal soap, to treat infestations.
- Frequency: Inspect weekly, and treat as needed.
Pro Tip: Keep a close eye on your plants for any changes in appearance, such as yellowing leaves or slowed growth. These can be signs of underlying issues like improper watering, lighting, or nutrient deficiencies.
Indoor Living Wall and How to Handle Common Problems: Mold, Plant Death, and Nutrient Deficiencies
No garden is without its challenges, and a living wall is no exception. Here’s how to tackle some common issues you might encounter:
Mold and Mildew:
- Causes: Excess moisture and poor air circulation can lead to mold and mildew growth.
- Solutions: Improve air circulation around your living wall by using fans or adjusting the room’s ventilation. Reduce watering frequency and remove affected plants or areas immediately.
- Prevention: Ensure proper drainage and avoid overwatering.
Plant Death:
- Causes: Plants can die due to a variety of reasons, including improper lighting, over or under-watering, or pest infestations.
- Solutions: Identify the cause before replacing the plant. If it’s a light issue, adjust the lighting or replace the plant with a species better suited to the conditions.
- Prevention: Choose plants that are well-suited to your wall’s environment, and monitor their health regularly.
Nutrient Deficiencies:
- Symptoms: Yellowing leaves, stunted growth, and poor flowering are signs of nutrient deficiencies.
- Solutions: Apply a balanced fertilizer, focusing on nutrients like nitrogen, phosphorus, and potassium. For specific deficiencies, such as iron or magnesium, use targeted supplements.
- Prevention: Regular feeding and soil testing can help prevent deficiencies before they affect plant health.
Table: Quick Solutions to Common Living Wall Problems
| Problem | Cause | Solution |
|---|---|---|
| Mold/Mildew | Excess moisture, poor ventilation | Improve air circulation, reduce watering |
| Plant Death | Improper care, environmental issues | Identify cause, replace with suitable plants |
| Nutrient Deficiency | Lack of essential nutrients | Apply balanced fertilizer, use supplements |
Seasonal Adjustments and Long-Term Care
Your living wall’s needs will change with the seasons, especially if your plants have varying growth cycles. Here’s how to adjust your care routine throughout the year:
Spring and Summer:
- Increased Watering: Plants grow more actively in these seasons and may require more frequent watering.
- More Fertilizer: Feed regularly to support new growth.
- Pruning: Prune to shape plants and remove any dead or damaged growth.
Fall and Winter:
- Reduced Watering: Growth slows down, so reduce watering to prevent root rot.
- Minimal Feeding: Hold off on fertilizing during the dormant months.
- Lighting: Consider increasing artificial lighting to compensate for shorter daylight hours.
Long-Term Care Tips:
- Soil Replacement: Every few years, replace the soil in your planters to refresh nutrients and prevent compaction.
- Structural Checks: Inspect the wall structure periodically to ensure it’s still secure and can handle the weight of mature plants.
- Plant Rotation: Rotate plants to give each one optimal light exposure and to refresh the overall look of your living wall.
Pro Tip: Keep a gardening journal to track the health and growth of your living wall over time. This can help you identify patterns and make more informed decisions about care and maintenance.
Indoor Living Wall: Seasonal Care and Adjustments
A living wall isn’t static—its needs and appearance will change with the seasons. Understanding these changes and adjusting your care routine accordingly is key to keeping your wall healthy and vibrant year-round.
How to Adjust Care Routines Based on Seasonal Changes
As the seasons change, so do the environmental conditions in your home. Here’s how to tweak your care routine to match the season:
Spring:
- Wake-Up Call: As daylight increases, your plants will start to grow more actively. Resume regular feeding and watering, and be on the lookout for new growth that needs support or training.
- Pruning: Remove any dead or damaged growth from the winter to encourage new, healthy shoots.
Summer:
- Hydration Focus: With higher temperatures, plants may need more water. Increase your watering schedule, especially for sun-loving species.
- Pest Patrol: Warm weather can bring out pests. Keep a close eye on your plants and act quickly if you notice any infestations.
Fall:
- Slow Down: As the days shorten, your plants will start to slow their growth. Gradually reduce watering and feeding.
- Prepare for Dormancy: Some plants may enter a dormant phase. Let them rest by cutting back on care routines and removing any spent foliage.
Winter:
- Light Management: With less natural light, consider using grow lights more frequently. Position them to compensate for the shorter days.
- Minimal Watering: Plants require less water during their dormant period. Be careful not to overwater, which can lead to root rot.
Preparing Your Indoor Living Wall for Winter or Low-Light Conditions
Winter can be tough on indoor plants, especially if your living wall is in a space with limited light. Here’s how to prep your wall for the colder months:
- Increase Lighting: Use grow lights to supplement natural light. Position them to cover the entire wall evenly.
- Humidity Control: Indoor heating can dry out the air, which isn’t ideal for many plants. Use a humidifier or place water trays near the wall to maintain moisture levels.
- Insulate Your Wall: If your living wall is near a drafty window or exterior wall, consider insulating the area to keep temperatures consistent.
Pro Tip: Some plants, like ferns and certain tropical species, thrive in higher humidity. Group these plants together and mist them regularly to keep the environment moist.
By adjusting your care routine with the seasons, you’ll ensure that your living wall remains a thriving, dynamic feature in your home all year long. Each season brings its own challenges, but with the right approach, your living wall can flourish through them all.
Incorporating Technology into Your Indoor Living Wall
As with many aspects of modern life, technology has found its way into gardening—and living walls are no exception. By integrating smart technology into your living wall, you can enhance its functionality, simplify maintenance, and even optimize plant growth. Here’s how to bring your green wall into the 21st century.
Smart Irrigation Systems
Watering your living wall can be tricky, especially if you’re balancing different plant types with varying water needs. Smart irrigation systems take the guesswork out of the equation by using sensors and automated controls to manage watering.
Features of Smart Irrigation Systems:
- Moisture Sensors: These sensors detect the moisture level in the soil or planting medium and adjust the watering schedule accordingly. If the soil is too dry, the system will automatically water the plants, ensuring they get exactly what they need without overwatering.
- Automated Timers: Set your irrigation system on a schedule to water your plants at optimal times of the day. Some systems even adjust for seasonal changes, delivering more water during hot months and less during cooler periods.
- Remote Monitoring and Control: Many smart irrigation systems connect to your smartphone, allowing you to monitor and control the system remotely. This is perfect for when you’re away from home but want to ensure your plants are still getting the care they need.
Pro Tip: Consider integrating a rainwater collection system with your smart irrigation setup. This sustainable approach not only conserves water but also ensures your plants receive natural, untreated water, which is often better for their health.
Indoor Living Wall: Using Sensors for Humidity and Soil Moisture
To maintain a healthy living wall, it’s crucial to monitor the environment around it—especially humidity and soil moisture levels. Sensors can help you keep these factors in check without constant manual observation.
Humidity Sensors:
- Purpose: Measure the humidity levels around your living wall, ensuring it stays within the optimal range for your plants.
- Benefits: Many indoor plants, especially tropical ones, thrive in higher humidity. By using a humidity sensor, you can maintain the right levels, preventing issues like leaf browning or wilting.
- Integration: Some sensors can be integrated with humidifiers or dehumidifiers, automatically adjusting the room’s humidity based on real-time data.
Soil Moisture Sensors:
- Purpose: Detect the moisture level in the soil and alert you when it’s time to water.
- Benefits: Prevents both overwatering and underwatering, which are common problems in living walls.
- Integration: These sensors can be linked to your smart irrigation system, automatically triggering watering when the soil becomes too dry.
Pro Tip: Place multiple sensors in different parts of your living wall to get an accurate reading of the entire system. This is especially important if you have a large or complex wall with various plant species.
Enhancing Growth with LED Grow Lights
While we’ve already covered the importance of lighting, integrating LED grow lights with smart technology can take your living wall to the next level. Here’s how:
- Automated Light Cycles: Smart LED grow lights can be programmed to mimic natural light cycles, providing your plants with the perfect balance of light and dark periods. This can be particularly useful for plants that require specific photoperiods to bloom.
- Custom Light Spectrums: Advanced LED grow lights allow you to customize the spectrum of light to suit different plants’ needs. For instance, you can increase the blue light for leafy greens or add more red light for flowering plants.
- Remote Control and Monitoring: Like smart irrigation systems, many LED grow lights can be controlled remotely via a smartphone app. This allows you to adjust light settings from anywhere, ensuring your plants always get the light they need.
Pro Tip: Consider using a smart lighting system that adjusts the light intensity based on the time of day or the plant’s growth stage. This creates a more natural growing environment and can boost plant health and productivity.
Indoor Living Wall: Troubleshooting Common Problems
Even with the best setup, living walls can encounter issues. Knowing how to identify and address these problems is key to maintaining a healthy, thriving green wall. Here’s a guide to troubleshooting some of the most common problems you might face.
Yellowing Leaves: Causes and Solutions
Yellowing leaves are often a sign that something is wrong with your living wall. This issue can be caused by several factors, each requiring a different solution.
Common Causes:
- Overwatering: Too much water can suffocate the roots, leading to yellow leaves. Check your irrigation system and reduce watering if necessary.
- Underwatering: Conversely, not enough water can stress the plants, causing the leaves to turn yellow. Ensure that your plants are getting enough moisture, especially during dry periods.
- Nutrient Deficiency: A lack of essential nutrients like nitrogen can lead to yellowing leaves. Apply a balanced fertilizer to replenish the soil.
- Pests or Disease: Insects or fungal infections can also cause yellowing leaves. Inspect your plants for signs of pests or disease and treat accordingly.
Pro Tip: If only the lower leaves are turning yellow, it might be a natural process of the plant shedding older leaves. However, if the yellowing is widespread, it’s time to investigate further.
Mold and Mildew: Prevention and Treatment
Mold and mildew can quickly become a problem in living walls, especially in areas with high humidity and poor air circulation. Here’s how to prevent and treat these fungal issues.
Prevention Tips:
- Improve Air Circulation: Use fans or adjust the ventilation in the room to keep the air moving. This helps to reduce the humidity levels and prevent mold growth.
- Proper Watering: Overwatering can create a damp environment that’s perfect for mold. Ensure your irrigation system isn’t delivering too much water and that there’s proper drainage.
- Use Fungicides: If you notice mold or mildew, treat the affected area with a natural fungicide. Neem oil is a good organic option that’s safe for most plants.
Treatment Steps:
- Isolate the Problem: Remove any plants that are heavily infected to prevent the mold from spreading.
- Clean the Area: Use a diluted bleach solution or hydrogen peroxide to clean the affected area on the wall or planters.
- Replant: Once the area is clean and dry, you can replant with fresh, healthy plants.
Pro Tip: Regularly inspect your living wall for early signs of mold or mildew, especially in the more humid months. Early detection is key to preventing a small problem from becoming a big one.
Drooping or Wilting Plants: Diagnosing the Issue
Drooping or wilting plants can be a distressing sight, but the cause is usually easy to diagnose and fix.
Common Causes:
- Underwatering: If your plants are drooping, the first thing to check is the soil moisture. Dry soil is a clear sign that the plants need water.
- Overwatering: On the flip side, too much water can cause roots to rot, leading to wilting. Check for waterlogged soil and adjust your irrigation system if needed.
- Temperature Stress: Extreme temperatures—either too hot or too cold—can cause plants to droop. Ensure your living wall is in a stable environment.
- Pests: Some pests, like aphids, can cause plants to wilt. Inspect the plants closely and treat them if necessary.
Pro Tip: If you’re unsure whether a plant is overwatered or underwatered, check the soil about an inch below the surface. If it’s dry, water the plant. If it’s soggy, allow it to dry out before watering again.
By incorporating smart technology and knowing how to troubleshoot common issues, you’ll be well-equipped to maintain a thriving, healthy living wall. Whether you’re dealing with yellowing leaves, mold, or drooping plants, understanding the root cause and addressing it promptly will keep your living wall looking lush and vibrant.
Indoor Living Wall and Long-Term Care: Ensuring the Longevity of Your Living Wall
A living wall is a long-term commitment. To keep it thriving for years to come, you’ll need to focus on regular upkeep, occasional refurbishments, and proactive management. The longevity of your living wall depends on consistent care and attention to its evolving needs.
Replacing Plants and Refreshing Soil
Over time, some plants may outgrow their space, become less vigorous, or even die. This is a natural part of gardening, but it means you’ll need to be prepared to replace plants and refresh the soil periodically.
Replacing Plants:
- When to Replace: Replace plants when they show signs of decline, such as significant leaf drop, yellowing, or stunted growth. Some plants may also become too large for their designated space and need to be swapped out for smaller ones.
- How to Replace: Carefully remove the old plant by loosening the soil around its roots. Choose a new plant that suits the existing light and moisture conditions, and gently settle it into the space, ensuring it’s properly anchored.
- Considerations: Select plants that have similar care requirements to the existing ones to maintain consistency across the wall.
Refreshing Soil:
- Why It’s Important: Over time, the soil in your living wall can become compacted, depleted of nutrients, or develop an imbalance in pH. Refreshing the soil rejuvenates the root environment, providing plants with the nutrients they need.
- How to Refresh: Depending on your living wall system, remove the plants and either replace the soil or mix in fresh compost or potting mix. Ensure the new soil is well-draining and appropriate for the types of plants in your wall.
Pro Tip: If you notice that plants are struggling despite being replaced, it might be worth checking the entire soil structure. Sometimes, a more extensive refresh or even a complete soil change might be necessary.
Structural Inspections and Reinforcements
The physical structure of your living wall is just as important as the plants it supports. Regular inspections and reinforcements are essential to ensure the wall remains safe and secure.
Regular Inspections:
- Check for Wear and Tear: Over time, the materials holding up your living wall may degrade, especially in environments with high humidity. Check for signs of rust, rot, or weakened joints.
- Inspect the Anchors: Ensure that the anchors holding your wall to the structure are still secure. This is particularly important if the wall has grown heavier with mature plants.
- Look for Leaks: If your wall includes an irrigation system, inspect the plumbing for leaks, drips, or signs of water damage to the wall behind it.
Reinforcing the Structure:
- Adding Support: If your wall has become heavier over time, consider adding additional support brackets or anchors to distribute the weight more evenly.
- Material Upgrades: If you notice that parts of the structure are starting to fail, consider upgrading to more durable materials. For example, replacing wood that shows signs of rot with treated timber or metal can extend the life of your wall.
- Professional Help: For large or complex living walls, it might be worth hiring a professional to perform a thorough inspection and make necessary reinforcements.
Pro Tip: Keep a maintenance log to track when inspections and repairs are performed. This helps ensure that no aspect of the structure is overlooked.
Plant Rotation and Seasonal Replanting
Just like any garden, a living wall benefits from occasional rotation and replanting. This keeps the design fresh and ensures that all plants receive adequate light and space to grow.
Plant Rotation:
- Why Rotate?: Rotating plants allows them to receive even light exposure, which is particularly important for walls with uneven lighting. It also gives plants that may have been shaded by larger neighbors a chance to thrive.
- How to Rotate: Gently remove and reposition plants within the wall. Be mindful of root structures and avoid damaging them during the process.
Seasonal Replanting:
- Why Replant?: Some plants are seasonal and may not survive year-round in your living wall. Replacing them with new, season-appropriate species keeps your wall vibrant and healthy.
- When to Replant: Spring and fall are ideal times for replanting, as temperatures are moderate and plants can establish themselves before extreme weather conditions.
- Choosing New Plants: Select plants that complement the existing design and thrive in the current seasonal conditions. This might include adding flowering plants in the spring or drought-tolerant species in the summer.
Pro Tip: Keep your wall’s design and color scheme in mind when rotating or replanting. This ensures that your living wall remains a cohesive and visually appealing feature in your space.
By focusing on long-term care, including regular plant replacements, structural inspections, and strategic replanting, you can ensure that your living wall remains a vibrant and integral part of your space for years to come.
Indoor Living Wall: Eco-Friendly Practices and Sustainability
A living wall is not just about aesthetics—it’s also a commitment to sustainability. By integrating eco-friendly practices into the care and maintenance of your wall, you can reduce your environmental impact and create a truly green space.
How Living Walls Contribute to Sustainability
Living walls are more than just beautiful—they’re also powerful tools for environmental sustainability. Here’s how your living wall can make a positive impact:
Air Quality Improvement:
- Pollutant Absorption: Plants in your living wall absorb carbon dioxide and other pollutants, filtering the air and improving indoor air quality.
- Oxygen Production: Through photosynthesis, the plants in your wall release oxygen, contributing to a healthier indoor environment.
Energy Efficiency:
- Natural Insulation: Living walls can act as natural insulators, reducing the need for artificial heating and cooling. The plants and soil absorb heat during the day and release it slowly, helping to regulate indoor temperatures.
- Reduced Energy Consumption: By improving insulation, living walls can lower energy consumption and reduce your carbon footprint.
Biodiversity Promotion:
- Habitat Creation: Even in urban settings, living walls provide habitats for insects, birds, and other wildlife. This can help boost local biodiversity and support urban ecosystems.
Pro Tip: To maximize the sustainability of your living wall, consider using native plant species. These are better adapted to your local climate and require less water and care.
Choosing Eco-Friendly Materials and Systems
When building and maintaining your living wall, the materials and systems you choose can have a significant impact on its overall sustainability.
Eco-Friendly Materials:
- Recycled Materials: Use recycled or upcycled materials for the framework, planters, and other structural elements of your wall. This reduces the demand for new resources and minimizes waste.
- Sustainable Wood: If using wood in your living wall, opt for sustainably sourced timber. Look for certifications like FSC (Forest Stewardship Council) to ensure the wood comes from responsibly managed forests.
- Low-Impact Growth Media: Choose growth media that are sustainable and have a low environmental impact. Options like coir (coconut fiber), recycled plastic felt, or organic soil mixes are better for the environment than synthetic alternatives.
Sustainable Irrigation Systems:
- Rainwater Harvesting: Incorporate a rainwater harvesting system into your living wall’s irrigation setup. This not only conserves water but also uses a natural resource that would otherwise go to waste.
- Drip Irrigation: Use a drip irrigation system to minimize water waste. These systems deliver water directly to the roots, reducing evaporation and runoff.
- Smart Watering Systems: As mentioned earlier, smart irrigation systems with moisture sensors can optimize water use, ensuring that your plants receive just the right amount of water without waste.
Pro Tip: Consider the lifecycle of the materials and systems you use. Choose options that are not only sustainable in their production but also biodegradable or recyclable at the end of their life.
Reducing Waste and Promoting Recycling
Maintaining a living wall can generate waste, but there are ways to minimize this and promote recycling.
Composting Plant Waste:
- What to Compost: Dead leaves, pruning clippings, and spent plants can all be composted rather than thrown away. Composting returns valuable nutrients to the soil and reduces waste.
- How to Compost: Set up a compost bin or pile in your garden or use a small indoor composting system if space is limited. Regularly turn the compost to speed up decomposition.
Recycling Materials:
- Planter Recycling: When replacing planters or modules, choose recyclable options. Many plastic planters can be recycled, or you can opt for biodegradable alternatives.
- Packaging Recycling: If you purchase new plants or materials, be sure to recycle any packaging. Cardboard, plastic, and paper can often be recycled through local programs.
Pro Tip: Aim to reduce waste from the start by choosing durable, long-lasting materials and by planning your living wall to minimize the need for frequent replacements.
By integrating these eco-friendly practices into the design and maintenance of your living wall, you can create a space that not only looks beautiful but also contributes positively to the environment. Sustainability is at the heart of what makes a living wall truly “green,” and with thoughtful choices, your wall can become a model of eco-friendly design.
Indoor Living Wall: Conclusion
Indoor living walls are much more than just a trend—they are a powerful way to transform spaces, improve air quality, and create a connection with nature. From residential homes to commercial and public spaces, these green walls offer a multitude of benefits, including enhanced aesthetics, better health outcomes, and increased energy efficiency.
By carefully planning your living wall—considering factors like location, plant selection, irrigation, and lighting—you can create a thriving vertical garden that suits your space and lifestyle. With regular maintenance and a focus on sustainability, your living wall can remain a vibrant part of your environment for years to come.
As the case studies demonstrate, living walls can be successfully integrated into a variety of settings, each with its own unique challenges and rewards. Whether you’re looking to create a serene retreat in your home, boost productivity in your office, or contribute to sustainability in a public space, an indoor living wall offers a versatile and impactful solution.
So, are you ready to bring your walls to life? Start planning today, and transform your space with the beauty and benefits of a living wall.
If you want to learn about our consultancies in Portuguese language, click here.
Unlock Premium, Members-Only Content
Your source for the most relevant updates in sustainable construction