Unlock Premium, Members-Only Content
Your source for the most relevant updates in sustainable construction
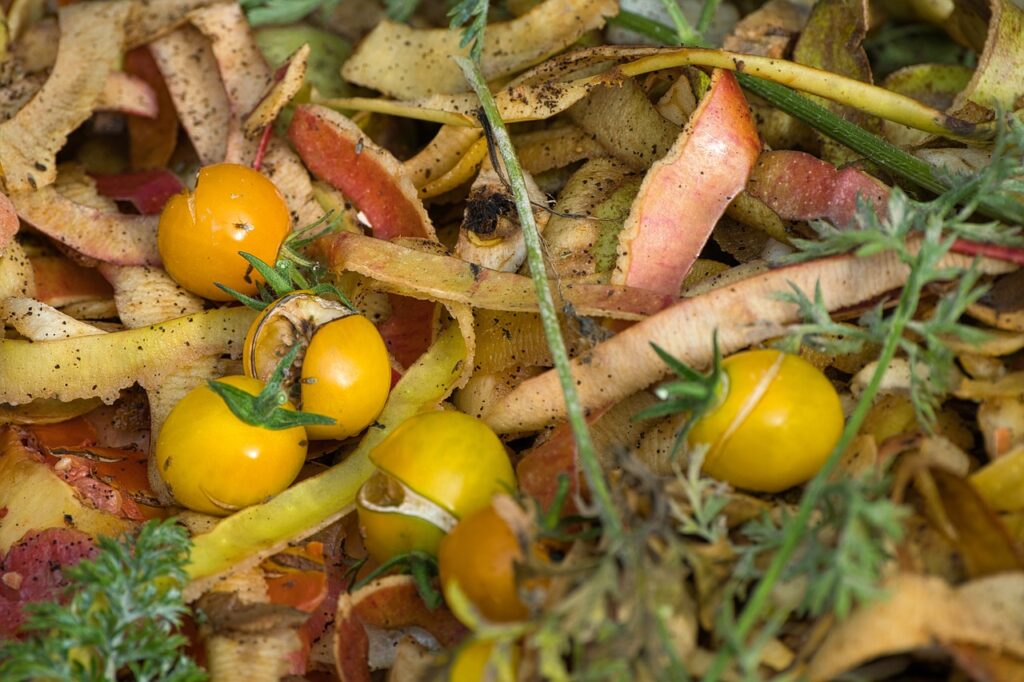
Introduction to Home Composting
Ready to turn your kitchen scraps into garden gold? Composting is one of the easiest and most effective ways to reduce waste, help the environment, and supercharge your soil. It’s all about taking what you would normally toss out—like veggie scraps and yard waste—and transforming it into rich, nutritious compost that your plants will love.
But don’t worry if you’re just starting out! This guide will break down the basics, make it fun, and help you figure out which composting method suits your lifestyle. Whether you’re a backyard gardener or an apartment dweller, there’s a composting method for everyone.
Let’s dive in!
Home Composting: Types of Composting Methods
Composting isn’t one-size-fits-all. Depending on your space, effort level, and time commitment, you can choose between several different methods. Here’s a quick breakdown:
Hot Composting
Think of hot composting as the turbo version of composting. It’s fast, effective, and generates heat—lots of it. We’re talking temperatures of up to 160°F (71°C)! This method requires more effort but rewards you with finished compost in as little as a month.
Key Steps:
- Ratio: Aim for a balance of browns (carbon-rich materials like dried leaves) and greens (nitrogen-rich scraps like veggie peelings).
- Aeration: You’ll need to turn the pile frequently to introduce oxygen.
- Temperature: Hot composting works best when the internal temperature hits between 110°F to 140°F.
| Pros | Cons |
|---|---|
| Quick results (1-3 months) | Requires regular maintenance |
| Destroys weeds and pathogens | Needs more space |
| Efficient at breaking down materials |
Cold Composting
Cold composting is the laid-back version. Less work, but more time. You simply toss your organic waste into a pile and let nature do its thing over a year or more.
Key Steps:
- Add materials slowly: No need to turn the pile often, just keep adding organic matter.
- Patience: Cold composting takes about a year or longer for everything to break down fully.
| Pros | Cons |
|---|---|
| Minimal effort | Takes 12 months or more |
| Great for smaller gardens | Doesn’t kill weed seeds |
| Suitable for lazy gardeners |
Vermicomposting (Composting with Worms)
Let worms do the dirty work! Vermicomposting is a great option for indoor composting or if you don’t have a backyard. Worms eat your kitchen scraps and turn them into “worm castings”—basically, nutrient-packed compost.
Key Points:
- Best for small-scale composting.
- Needs specific worms (red wigglers are popular).
- Requires some setup, but very low-maintenance once established.
Bokashi Composting
Bokashi is a lesser-known but super efficient composting method. It’s an anaerobic process (no oxygen needed) and ferments food waste using special Bokashi bran. Ideal for composting meat, dairy, and cooked foods, which aren’t recommended in traditional compost piles.
Key Points:
- Needs a specialized Bokashi bin and bran.
- Perfect for indoor use.
- Fast—ferments food scraps in as little as two weeks.
Trench Composting
For the adventurous gardener, trench composting involves digging a hole or trench in your garden and burying organic waste. Over time, it decomposes directly in the soil, enriching it without extra effort.
Home Composting: Choosing the Right Composting Method for Your Household
Now that you know the options, which one is right for you? Here’s a cheat sheet to help you decide:
| Method | Best For | Effort Level | Time |
|---|---|---|---|
| Hot Composting | Large gardens, fast results | High | 1-3 months |
| Cold Composting | Small gardens, low maintenance | Low | 12+ months |
| Vermicomposting | Apartments, kitchen scraps | Medium | 2-4 months |
| Bokashi Composting | Meat/dairy, indoor composting | Medium | 2-4 weeks |
| Trench Composting | Gardeners with space to dig | Low | 6-12 months |
So, if you want quick results and are ready to invest time turning your pile, hot composting is your best bet. If you’re in an apartment, vermicomposting or Bokashi might be perfect. And for those who want to keep it simple, cold or trench composting will work just fine.
Home Composting: Setting Up Your Compost Bin or Pile
Now that you’ve chosen the right composting method, it’s time to set up your bin or pile. Whether you’re going for a simple pile in the backyard or a more structured system indoors, getting the basics right from the start will make all the difference.
Home Composting: Outdoor Composting
If you’ve got the space, setting up an outdoor compost pile or bin is straightforward. Here’s what you need to know:
- Location, Location, Location: Choose a spot with good drainage that’s easily accessible but out of direct sunlight (to prevent drying out). Ideally, this spot should also be close to your garden for easy access to compost later.
- Materials: You’ll need a mix of green materials (like veggie scraps and grass clippings) and brown materials (such as dry leaves and twigs). Keep a rough ratio of 2:1 (browns to greens) for best results.
- Setup:
- Compost Bin: If you prefer a tidy system, compost bins come in all shapes and sizes—from DIY wooden bins to store-bought tumblers. These keep your compost contained and can make turning the pile easier.
- Compost Pile: If you’re going low-maintenance, you can start a simple pile directly on the ground. Layer your greens and browns, keeping the pile moist but not waterlogged.
- Aeration and Moisture: Regularly turn your compost to allow air to circulate, and keep an eye on moisture levels. A compost pile should be as damp as a wrung-out sponge.
Home Composting: Indoor Composting
Don’t have a yard? No problem. Indoor composting is totally doable, and with the right bin, it won’t stink or attract pests. Here are your options:
- Vermicomposting: All you need is a bin and some red wigglers (special composting worms). Place your bin under the kitchen sink or in a garage, feed it kitchen scraps regularly, and let the worms do their thing.
- Bokashi: A great option for those who want to compost meat and dairy. You’ll need a special Bokashi bin and bran, but it’s easy to use and fast, producing compost in a few weeks.
Home Composting and Composting Materials: Greens vs. Browns
The key to a healthy compost pile is a good mix of materials. Get the balance right, and you’ll have rich, crumbly compost in no time. Too much of one or the other, and you might end up with a soggy mess or a dry pile that doesn’t break down.
What Are Greens?
Greens are your nitrogen-rich materials. These are the “juicy” parts of your compost pile, helping to speed up decomposition and providing nutrients for microorganisms.
Examples of Greens:
- Vegetable scraps
- Coffee grounds
- Grass clippings
- Fruit peels
- Manure (from herbivores)
What Are Browns?
Browns are carbon-rich materials. They provide the structure and help balance the high-moisture greens, ensuring your pile doesn’t get too wet.
Examples of Browns:
- Dried leaves
- Paper (shredded)
- Straw
- Twigs
- Cardboard
The Right Ratio: 2 Parts Browns to 1 Part Greens
Why does the ratio matter? Too many greens can make your compost pile slimy and smelly, while too many browns will slow down decomposition. A good rule of thumb is to aim for two parts browns to one part greens.
| Greens (Nitrogen) | Browns (Carbon) |
|---|---|
| Vegetable scraps | Dried leaves |
| Coffee grounds | Shredded paper |
| Grass clippings | Straw |
| Fruit peels | Twigs |
When adding to your compost pile or bin, try to alternate layers of greens and browns to keep things balanced. This layering method ensures proper airflow and a faster breakdown of materials.
Home Composting: How to Start a Compost Pile or Bin
Now it’s time to get hands-on and build your compost pile or fill your bin. Whether you’re going for an outdoor pile, a bin in the backyard, or a neat indoor solution, the process is pretty similar. Let’s break it down step-by-step:
Step-by-Step Guide to Starting Your Compost Pile:
- Pick Your Spot: For outdoor composting, choose a location with good drainage. You want your compost pile or bin somewhere accessible but out of direct sunlight so it doesn’t dry out.
- Start with Browns: Always start with a layer of brown materials (like dried leaves, paper, or straw) at the bottom. This layer helps aerate the pile and promotes better drainage.
- Layer It Like a Lasagna: Alternate layers of greens (kitchen scraps, grass clippings) and browns (twigs, paper). Stick to the 2:1 ratio for optimal results.
- Moisture Matters: Keep the compost pile moist but not soggy. Think of a wrung-out sponge—that’s the perfect level of moisture for decomposition.
- Aerate Regularly: Turn the compost every few weeks to introduce oxygen. This helps break down the materials faster and prevents bad smells.
- Monitor: If you’re using a hot composting method, keep an eye on the temperature. Compost should ideally reach between 110°F and 140°F.
| Steps | Materials Needed |
|---|---|
| Choose location | Compost bin or designated space |
| Add browns layer | Dry leaves, shredded paper |
| Add greens layer | Kitchen scraps, grass clippings |
| Maintain moisture | Water (as needed) |
| Turn for aeration | Shovel or compost fork |
Hot vs. Cold Composting: Which Is Better for You?
The big question many new composters face: hot or cold composting? Both have their perks and challenges, so let’s compare them to help you figure out what’s best for you.
Hot Composting: Fast and High-Effort
Hot composting is all about speed and efficiency. By maintaining high temperatures (up to 160°F), you can break down materials in as little as one to three months. It’s ideal if you want fast results and have the time to maintain it.
Pros of Hot Composting:
- Quick: Finished compost in 1-3 months.
- Kills pathogens and weed seeds: High temps sterilize the pile.
- Great for larger amounts: Handles more organic waste.
Cons of Hot Composting:
- Requires attention: You’ll need to turn the pile regularly to maintain the heat.
- Space needed: Hot compost piles are usually bigger, around 3-4 feet wide and tall.
Cold Composting: Slow and Low-Effort
Cold composting is much more hands-off. You simply pile up your organic waste and let it decompose naturally. It takes a lot longer—sometimes over a year—but requires almost no effort.
Pros of Cold Composting:
- Easy: Just pile up and forget about it.
- Minimal maintenance: No need to turn or monitor the temperature.
- Small scale: Works for smaller yards or gardens.
Cons of Cold Composting:
- Takes a long time: Expect 12-18 months for finished compost.
- Weed seeds may survive: Lower temperatures won’t kill them.
- Can attract pests: If not carefully managed, cold compost can draw rodents or insects.
Which Method is Best for You?
Here’s a quick breakdown to help you choose:
| Factor | Hot Composting | Cold Composting |
|---|---|---|
| Time | 1-3 months | 12-18 months |
| Effort | High (requires turning, monitoring) | Low (little maintenance) |
| Space | Needs larger piles | Suitable for small spaces |
| Speed | Fast results | Slow, but easy |
If you want quick, nutrient-rich compost and don’t mind turning your pile regularly, hot composting is your best bet. But if you’re in no rush and prefer a low-maintenance approach, cold composting is the way to go.
Home Composting: How to Maintain Your Compost Pile
Once you’ve set up your compost pile or bin, the next step is to keep it healthy and thriving. Composting may seem like a set-it-and-forget-it task, but regular maintenance ensures your pile decomposes quickly and stays balanced. Here’s how to keep everything running smoothly:
1. Turn Your Compost Regularly
Turning your compost pile is crucial for aeration. Without enough oxygen, your compost can become anaerobic (which means smelly and slow to break down). To avoid this, turn your compost every 1-2 weeks. Use a shovel or compost fork to flip the materials, mixing in fresh air.
- Why it matters: Aeration speeds up decomposition and prevents bad odors.
- Tip: A compost tumbler makes this process easier if you prefer less manual labor.
2. Keep It Moist
A dry compost pile won’t break down, and an overly soggy one will become a sludgy mess. The trick is to keep it as damp as a wrung-out sponge. If the pile is too dry, sprinkle it with water. If it’s too wet, add more brown materials (like leaves or straw) to absorb excess moisture.
- Check regularly: During dry weather or in hot climates, compost piles can dry out quickly, so water them as needed.
3. Monitor Temperature (for Hot Composting)
If you’re going the hot composting route, temperature is key. Your compost should reach between 110°F to 140°F for optimal breakdown. To check the temperature, use a compost thermometer (or a simple kitchen thermometer) and stick it into the center of the pile.
- Why it matters: Keeping the temperature within this range accelerates decomposition and kills pathogens or weed seeds.
4. Layer It Right
Continue layering green and brown materials as you add to the pile. Stick to the 2:1 ratio (two parts browns to one part greens) to keep the balance of carbon and nitrogen just right.
Home Composting: Troubleshooting Common Composting Issues
Even the best-laid compost piles can run into problems from time to time. But don’t worry—most issues can be fixed easily once you know what to look for. Let’s tackle the most common composting problems and how to solve them.
1. Smelly Compost
Compost that smells bad—like rotting food or ammonia—usually indicates too many green materials (like kitchen scraps) or not enough oxygen. Here’s how to fix it:
- Solution: Add more browns (dry leaves, straw) to absorb moisture and balance out the nitrogen. Then, turn your pile more frequently to introduce oxygen.
2. Slow Decomposition
If your compost pile seems to be sitting there without breaking down, it’s likely due to one of three issues: lack of greens, low temperature, or large material pieces.
- Solution: Chop up materials into smaller pieces to speed up decomposition. If it’s cold outside, consider adding more nitrogen-rich greens to heat things up. Also, make sure your pile is getting enough moisture and air.
3. Attracting Pests
If you notice unwanted visitors like rodents or insects in your compost, you might be adding materials that shouldn’t be composted, like meat or dairy products.
- Solution: Stick to plant-based scraps and avoid adding any animal products. If you’re still having issues, consider using a compost bin with a secure lid to keep pests out.
4. Too Wet or Too Dry
If your compost pile is either too wet (and soggy) or too dry (and crumbly), it can slow down decomposition and lead to other problems like odor or mold.
- Solution for Wet Compost: Add more brown materials to soak up moisture and turn the pile to introduce air.
- Solution for Dry Compost: Add water gradually while turning the pile to ensure even moisture distribution.
5. Weeds Growing in the Compost
If you see weeds sprouting from your compost pile, it’s usually because the pile isn’t getting hot enough to kill the seeds.
- Solution: Make sure your pile is large enough and contains enough green materials to generate the heat needed to sterilize weed seeds. Alternatively, use finished compost that still contains seeds as mulch rather than mixing it into the soil.
Home Composting: Special Composting Techniques
If you want to take your composting game to the next level, there are some lesser-known, specialized techniques you can try. These methods go beyond the traditional pile and offer unique benefits, whether you’re looking to compost specific materials like meat or find an ultra-convenient solution for urban composting.
Bokashi Composting: A New Way to Handle Food Scraps
Bokashi composting is a quick, indoor-friendly method that uses anaerobic bacteria to ferment food waste, including items you wouldn’t normally compost like meat, dairy, and cooked food. This method is perfect for city dwellers or those with limited outdoor space.
How it Works:
- You’ll need a Bokashi bin (which comes with a tight lid) and Bokashi bran, which contains the essential microbes that start the fermentation process.
- Layer food scraps with Bokashi bran in the bin, then seal the lid to keep air out.
- After about two weeks, the waste is “pickled” and ready to be added to a traditional compost bin or buried directly in the garden.
| Advantages of Bokashi | Drawbacks of Bokashi |
|---|---|
| Handles meat and dairy | Requires a specialized bin and bran |
| Works quickly (2-4 weeks) | Needs an extra step after fermentation |
| Can be done indoors | Not suitable as a standalone compost method |
Vermicomposting: Let Worms Do the Work
Vermicomposting, or worm composting, is ideal for small spaces and indoor setups. Red wigglers (the worms used for this method) happily consume your kitchen scraps and turn them into rich worm castings—one of the best organic fertilizers you can find.
Steps to Set Up Vermicomposting:
- Get a worm bin: These bins are designed to be pest-proof and allow air circulation.
- Add bedding: Start with a mix of shredded paper, coconut coir, or straw to create a comfortable environment for the worms.
- Feed your worms: Add food scraps like vegetable peels, coffee grounds, and fruit scraps. Avoid meat, dairy, and citrus.
- Harvest castings: After a few months, you’ll have nutrient-rich worm castings to mix into your soil.
| Advantages of Vermicomposting | Drawbacks of Vermicomposting |
|---|---|
| Great for indoor composting | Worms can’t handle meat, dairy, or citrus |
| Produces high-quality fertilizer | Requires some initial setup and worm care |
| Low odor and mess | Works best with specific types of waste |
Trench Composting: The No-Fuss Method
For those who want minimal effort, trench composting might be the answer. It’s as simple as digging a hole in your garden, burying organic waste, and letting it decompose right in the ground. Over time, the compost enriches the surrounding soil.
How to Do It:
- Dig a trench about 8-12 inches deep in your garden.
- Bury kitchen scraps and cover them with soil.
- Wait: After a few months, the organic material will break down and feed your plants.
This method is ideal for gardeners who don’t want a visible compost pile but still want to improve soil health naturally.
Home Composting: Indoor Composting Methods
If you live in an apartment or have limited outdoor space, don’t let that stop you from composting. Indoor composting methods, such as vermicomposting or using a compost tumbler, can be just as effective as traditional outdoor methods. Plus, they’re often cleaner and faster, making them a great option for urban composters.
Vermicomposting (Worm Composting)
As mentioned earlier, vermicomposting is a great indoor solution. A worm bin fits easily under the kitchen sink or in a small closet, and with minimal odor and mess, it’s a fantastic way to recycle kitchen scraps.
Basic Vermicomposting Tips:
- Feed regularly: Worms need to be fed small amounts of food scraps, about once a week. Keep an eye on the bin to ensure they’re consuming everything and adjust the amount of food accordingly.
- Maintain the right environment: The bedding should stay moist but not waterlogged. Add water if it feels dry, or more bedding if it’s too wet.
- Harvest castings: After a few months, move the worms to one side of the bin and collect the rich castings from the other side.
Compost Tumblers for Indoor Use
If worms aren’t your thing, consider a compost tumbler. These self-contained bins make it easy to rotate compost, speeding up the process while keeping it tidy.
Why Compost Tumblers Work Indoors:
- Compact: They fit in small spaces, like a balcony or garage.
- Fast decomposition: Regular turning helps materials break down faster.
- Pest-proof: With a lid and enclosed design, compost tumblers keep out rodents and bugs.
Home Composting: The Role of Microorganisms in Composting
Composting might seem like a simple pile of waste breaking down into soil, but behind the scenes, millions of tiny organisms are doing the real work. Microorganisms like bacteria, fungi, and protozoa play a crucial role in the composting process by breaking down organic matter into compost.
Bacteria: The Primary Decomposers
Bacteria are the true heroes of composting. These tiny organisms are responsible for the majority of decomposition, especially during the early stages. There are different types of bacteria involved in composting, each thriving at various stages of the process.
- Mesophilic Bacteria: These bacteria start the decomposition process at lower temperatures (around 70°F-100°F). They break down easily degradable materials like sugars and proteins.
- Thermophilic Bacteria: Once the temperature rises, these heat-loving bacteria take over. They thrive in temperatures up to 160°F and break down tougher organic materials like cellulose and lignin. This is why hot compost piles get so warm—they’re working hard!
- Actinobacteria: These bacteria help break down tough, woody material, which is why they’re essential for compost piles with lots of twigs, branches, or wood chips.
| Type of Bacteria | Temperature Range | Role in Composting |
|---|---|---|
| Mesophilic Bacteria | 70°F to 100°F | Start the decomposition of soft organic matter |
| Thermophilic Bacteria | 110°F to 160°F | Break down harder materials like cellulose |
| Actinobacteria | Various | Decompose woody materials and produce humus |
Fungi: The Unsung Heroes
Fungi, such as molds and yeasts, play a secondary but important role in composting. They specialize in breaking down tough plant materials that bacteria find difficult to digest, such as cellulose and lignin. Fungi thrive in cooler, more stable temperatures and are often seen in cold compost piles or at the outer edges of hot piles where temperatures are lower.
Protozoa and Nematodes: The Final Cleanup Crew
After the bacteria and fungi have done most of the work, protozoa and nematodes come in to finish the job. These microorganisms feed on bacteria and organic matter, helping to further break down the compost into finer particles. While not as efficient as bacteria, they play an important role in the overall health of the composting ecosystem.
Home Composting: How to Speed Up the Composting Process
If you’re impatient to see results from your compost pile, don’t worry—there are several ways to speed up the process. By controlling a few key factors, you can create an optimal environment for microorganisms to work their magic faster.
1. Chop Your Materials
The smaller the materials you add to your compost pile, the faster they will decompose. By cutting or shredding your kitchen scraps, leaves, and other organic matter into smaller pieces, you increase the surface area for microorganisms to attack.
- Tip: Shred leaves, cut up fruit and vegetable scraps, and break down larger branches or twigs before adding them to the pile.
2. Maintain the Right Balance of Greens and Browns
The perfect compost pile is all about balance. To keep your pile active and decomposing at a fast pace, maintain a 2:1 ratio of browns (carbon-rich materials like dry leaves and twigs) to greens (nitrogen-rich materials like food scraps and grass clippings). Too much green material can make the pile too wet and smelly, while too many browns can slow down decomposition.
3. Turn the Pile Frequently
Turning your compost pile introduces oxygen, which is essential for the microorganisms responsible for decomposition. The more often you turn the pile, the faster it will break down.
- Frequency: Turn your compost pile every 1-2 weeks to keep it aerated. If you’re hot composting, this is especially important to maintain heat and accelerate the process.
4. Monitor Moisture Levels
A compost pile that’s too dry will stop decomposing, while one that’s too wet will turn slimy and stinky. Keep the moisture level of your compost similar to a wrung-out sponge. If it feels dry, add some water. If it’s soggy, mix in more brown materials to absorb the excess moisture.
5. Home Composting: Add a Compost Activator
A compost activator is a product that adds extra bacteria and nutrients to the pile, kickstarting the decomposition process. Some composters even use a shovel full of finished compost as an activator since it already contains beneficial microorganisms.
| Methods to Speed Up Composting | Effectiveness |
|---|---|
| Chopping materials | Increases surface area for faster decomposition |
| Maintaining the green-brown balance | Keeps microorganisms active and working optimally |
| Turning the pile frequently | Ensures oxygen supply for faster breakdown |
| Monitoring moisture levels | Prevents the pile from drying out or getting too wet |
| Using a compost activator | Jumpstarts microbial activity |
By following these steps, you can significantly reduce the time it takes to turn your organic waste into nutrient-rich compost. Whether you’re hot composting or using a slower cold compost method, these tips will keep your pile active and productive.
Home Composting: When Is Compost Ready to Use?
Knowing when your compost is ready to be used is key to getting the most out of your hard work. Finished compost should resemble dark, crumbly soil with an earthy smell. Here’s how to tell when your compost has fully matured and is ready to enrich your garden.
Signs of Finished Compost
- Dark Brown or Black in Color: Finished compost looks like rich soil. It should be uniform in texture, with no visible scraps of food or large chunks of organic material.
- Earthy Smell: Compost that’s ready smells like fresh earth or a forest floor. If it smells sour or rotten, it needs more time to break down.
- Crumbly Texture: Good compost should be light and crumbly. If it’s still too sticky or dense, it needs more time to decompose.
- Temperature Drops: For hot compost piles, a drop in temperature (usually between 50°F and 80°F) indicates that the pile has finished decomposing.
| Indicators | What It Means |
|---|---|
| Dark brown/black color | Organic matter has fully decomposed |
| Earthy smell | Microorganisms have broken down the materials |
| Crumbly texture | Compost is aerated and nutrient-rich |
| Cooler temperature | Active decomposition has slowed or stopped |
How Long Does It Take for Compost to Be Ready?
The time it takes for compost to be ready depends on the method you’re using:
- Hot composting: 1-3 months
- Cold composting: 6-12 months
- Vermicomposting: 2-4 months
- Bokashi composting: 2-4 weeks (with an additional step to bury or add the fermented waste to a traditional compost pile)
If you’re unsure, perform a germination test by mixing some finished compost with potting soil and planting a few fast-growing seeds like lettuce or radishes. If the seeds sprout well, your compost is ready to go!
Home Composting: How to Use Finished Compost in Your Garden
Now that your compost is ready, it’s time to put it to good use! Whether you’re growing vegetables, flowers, or houseplants, compost is a powerhouse soil amendment that can boost plant health and improve soil structure.
1. Mix It Into Garden Beds
One of the best ways to use compost is by mixing it into garden soil before planting. Compost adds valuable nutrients, improves soil structure, and enhances moisture retention. For existing garden beds, spread 1-3 inches of compost on top of the soil and gently work it in with a rake or shovel.
2. Top Dressing for Plants
Compost works wonders as a top dressing for established plants. Spread a layer of compost around the base of plants, trees, or shrubs. As the compost breaks down, it slowly releases nutrients into the soil. This method is especially useful for perennials and fruit trees.
- Tip: Avoid piling compost directly against plant stems or trunks, as this can encourage rot.
3. Mulch for Lawns
You can use compost to improve your lawn by top-dressing it. Spread a thin layer of compost over the grass and water it in. Over time, the compost will improve soil structure, promote root growth, and help your lawn become more drought-resistant.
| Application Method | Benefits |
|---|---|
| Mix into garden beds | Boosts nutrient content and improves soil health |
| Top dress around plants | Slow release of nutrients, improves soil structure |
| Use as mulch on lawns | Helps lawn retain moisture, encourages healthy root growth |
4. Compost Tea for Houseplants
Houseplants love compost too! Create a nutrient-rich compost tea by steeping a shovelful of compost in a bucket of water for a few days. Strain the mixture and use the liquid to water your plants. Compost tea provides a gentle, nutrient boost for indoor plants without the risk of over-fertilizing.
5. Improve Potting Mix
If you’re growing vegetables, herbs, or flowers in containers, compost can greatly improve your potting mix. Combine 1 part compost with 2 parts standard potting soil to create a nutrient-dense mix that retains moisture and promotes healthy plant growth.
Home Composting: Advanced Composting Techniques
Once you’ve mastered the basics, it’s time to explore some advanced composting techniques. These methods offer more ways to optimize your composting process, whether you want to maximize efficiency or experiment with innovative approaches.
1. Composting in Cold Climates
If you live in a region with cold winters, composting can slow down significantly as temperatures drop. However, with a few adjustments, you can keep your compost pile active even in chilly weather.
Tips for Cold Climate Composting:
- Insulate the pile: Use straw bales, tarps, or extra layers of brown materials to keep the compost pile warmer.
- Add more nitrogen: During winter, greens (nitrogen-rich materials) can help maintain the necessary heat for decomposition.
- Turn less frequently: While turning introduces oxygen, it also releases heat. In cold climates, turn the pile less often to preserve warmth.
2. Home Composting and Using Compost in Permaculture Systems
Permaculture is all about creating sustainable ecosystems that work in harmony with nature. Composting plays a vital role in permaculture, as it helps recycle nutrients and improve soil health.
Key Strategies:
- Hügelkultur: This method involves building garden beds on top of logs and composting materials. Over time, the logs break down and act as a long-term source of nutrients for plants.
- Sheet mulching: Also known as “lasagna gardening,” this method layers compost, cardboard, and organic materials directly on the soil, creating nutrient-rich beds that suppress weeds and improve soil fertility.
Home Composting: Benefits of Composting for the Environment
Composting isn’t just great for your garden—it’s also a powerful tool for protecting the environment. By turning organic waste into nutrient-rich compost, you’re helping reduce landfill waste, lower greenhouse gas emissions, and promote sustainable land management.
1. Home Composting and Reducing Landfill Waste
Food scraps and yard waste make up more than 30% of what we throw away. When these organic materials decompose in landfills, they generate methane, a potent greenhouse gas. Composting diverts this waste from landfills, reducing methane emissions and cutting down on waste disposal costs.
2.Home Composting and Lowering Greenhouse Gas Emissions
Landfills are a significant source of methane, a greenhouse gas that’s far more potent than carbon dioxide. Composting helps mitigate this by allowing organic materials to break down aerobically, producing far less methane. Additionally, the compost itself sequesters carbon in the soil, further reducing the carbon footprint.
3. Home Composting and Enhancing Soil Health and Biodiversity
Compost enriches the soil, improving its structure, water retention, and nutrient content. Healthy soil also supports more biodiversity, including beneficial microorganisms, fungi, and insects. This, in turn, leads to healthier plants and ecosystems.
| Environmental Benefits | Impact |
|---|---|
| Reducing landfill waste | Less organic waste in landfills, fewer methane emissions |
| Lowering greenhouse gas emissions | Composting generates less methane than landfill decomposition |
| Improving soil health and biodiversity | Increases organic matter in soil, supports diverse ecosystems |
Home Composting: Conclusion
Home composting is more than just a way to dispose of kitchen scraps—it’s a step toward living sustainably and helping the environment. Whether you opt for hot or cold composting, vermicomposting, or even advanced methods like Bokashi or trench composting, you’re not just reducing waste; you’re turning it into a valuable resource for your garden.
From boosting soil health to lowering your carbon footprint, composting offers countless benefits. Plus, it’s a simple, rewarding process that anyone can do, regardless of space or experience. Start small, experiment with different methods, and in no time, you’ll be reaping the rewards of your rich, nutrient-dense compost.
So, are you ready to make the most of your organic waste and create a greener, more sustainable lifestyle? Happy composting!
If you want to learn about our consultancies in Portuguese language, click here.
Unlock Premium, Members-Only Content
Your source for the most relevant updates in sustainable construction